How To Master IoT Deployment Using Raspberry Pi Platform
Ever wondered how the Internet of Things (IoT) works in real-world scenarios? Well, buckle up because we're diving deep into the world of IoT deployment using Raspberry Pi. It’s like building a mini-smart city in your living room! If you’re into tech stuff, this is where the magic happens.
IoT has become more than just a buzzword; it’s a revolution that’s changing how we interact with technology. But deploying IoT projects can feel overwhelming if you don’t know where to start. That’s where Raspberry Pi comes in. Think of it as the Swiss Army knife of tech enthusiasts. Compact, versatile, and powerful, Raspberry Pi makes IoT deployment accessible for everyone.
So whether you're a hobbyist tinkering with gadgets or a professional looking to scale up your IoT game, this guide will walk you through every step. We’ll cover everything from setting up Raspberry Pi to deploying real-world IoT solutions. Trust me, by the end of this, you'll be ready to impress even the techiest geeks out there.
Read also:What Is The Gerber Life College Plan And How Can It Help You Save For Education
Table of Contents
Introduction to IoT Deployment
Why Raspberry Pi is Ideal for IoT
Hardware Requirements for IoT Deployment
Software Setup and Configuration
Integrating Sensors in IoT Projects
Read also:Unveiling The Feathered Mystery Was Dilophosaurus Cloaked In Feathers
Connecting to the Cloud for Data Management
Real-World Applications of IoT with Raspberry Pi
The Future of IoT and Raspberry Pi
Introduction to IoT Deployment
First things first, what exactly is IoT deployment? Simply put, it’s the process of setting up interconnected devices to collect, transmit, and analyze data. These devices could be anything from smart home gadgets to industrial sensors. The goal is to create a network of "things" that communicate seamlessly to provide insights or automate tasks.
Now, deploying IoT isn’t just about plugging in some wires and hoping for the best. It requires careful planning, the right hardware, and software configurations. And that’s where Raspberry Pi steps into the spotlight. This tiny but mighty device can act as the brain of your IoT setup, handling everything from data processing to communication with other devices.
But why Raspberry Pi? Well, it’s affordable, easy to use, and has a massive community backing it up. Plus, it’s compatible with tons of sensors and modules, making it a perfect choice for both beginners and pros. So, if you’re ready to get your hands dirty with some serious tech, let’s move on to the next section.
Why Raspberry Pi is Ideal for IoT
Raspberry Pi has become a favorite among IoT enthusiasts for a reason. Its compact size, low power consumption, and versatility make it an ideal platform for IoT deployment. Let’s break it down:
- Cost-Effective: You don’t need a fortune to get started with Raspberry Pi. Even the latest models are pretty affordable.
- Open-Source: The Raspberry Pi ecosystem thrives on open-source software and hardware, giving you endless possibilities for customization.
- Community Support: With millions of users worldwide, you’ll never run out of tutorials, forums, and support groups.
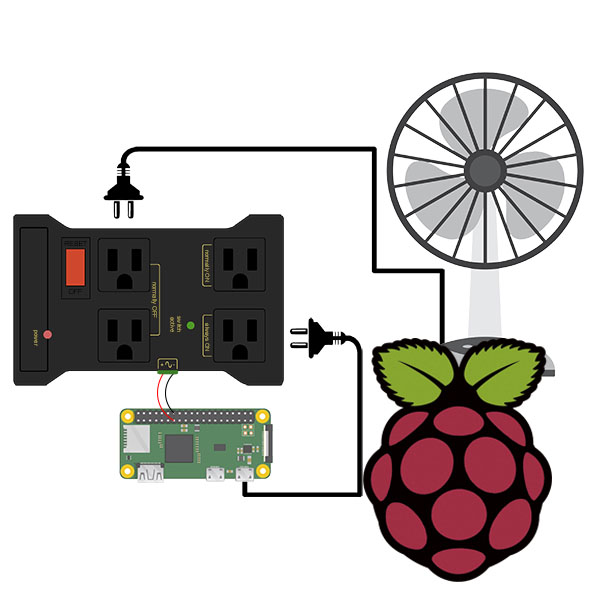
Plus, Raspberry Pi comes with GPIO pins that allow you to connect various sensors and actuators. This makes it super easy to integrate into any IoT project. Whether you’re building a weather station or a smart irrigation system, Raspberry Pi has got your back.
Why Choose Raspberry Pi Over Other Platforms?
While there are other platforms like Arduino and ESP32, Raspberry Pi stands out due to its processing power and ability to run full-fledged operating systems. This means you can handle complex tasks like data analysis and machine learning right on your Pi.
And let’s not forget the convenience of having a Linux-based OS at your disposal. It opens up a world of possibilities when it comes to scripting and automation. So, if you’re looking for a platform that can do it all, Raspberry Pi is your go-to choice.
Hardware Requirements for IoT Deployment
Before diving into the deployment process, you’ll need to gather the necessary hardware components. Here’s a list of essentials:
- Raspberry Pi Board: Choose the latest model for better performance and features.
- Power Supply: A reliable power source is crucial to avoid any interruptions during deployment.
- MicroSD Card: This will serve as the storage for your operating system and project files.
- Sensors: Depending on your project, you might need temperature, humidity, motion, or light sensors.
- Network Adapter: For wireless connectivity, a good Wi-Fi adapter is a must.
Remember, the hardware you choose will depend on the specific requirements of your project. For example, if you’re working on a weather monitoring system, you’ll need sensors that can accurately measure environmental conditions.
Setting Up Your Hardware
Once you’ve gathered all the components, it’s time to set them up. Start by inserting the microSD card into the Raspberry Pi and connecting all the sensors and modules. Make sure everything is securely plugged in before powering up the device.
Pro tip: Always double-check your connections to avoid any potential damage to your hardware. Trust me, this step can save you a lot of headaches down the line.
Software Setup and Configuration
With the hardware in place, it’s time to move on to the software side of things. The first step is to install an operating system on your Raspberry Pi. Raspberry Pi OS is the most popular choice, but you can also opt for other lightweight distributions like Ubuntu.
Once the OS is installed, you’ll need to configure it according to your project needs. This includes setting up Wi-Fi, enabling SSH for remote access, and installing necessary libraries for your sensors.
Installing Essential Libraries
Depending on the sensors you’re using, you might need to install specific libraries to interact with them. For example, if you’re using a DHT22 temperature and humidity sensor, you’ll need to install the Adafruit DHT library.
Here’s how you can do it:
- Open the terminal on your Raspberry Pi.
- Run the following command to update your system:
sudo apt update && sudo apt upgrade. - Install the library using:
sudo pip3 install adafruit-circuitpython-dht.
Easy peasy, right? With the right libraries installed, your Raspberry Pi will be able to communicate with your sensors without any issues.
Networking Essentials for IoT
Networking is a critical aspect of IoT deployment. After all, your devices need to communicate with each other and the cloud to function properly. Here’s how you can set up networking on your Raspberry Pi:
Start by configuring Wi-Fi settings. You can do this either through the GUI or by editing the wpa_supplicant.conf file. If you’re planning to deploy your IoT setup in a remote location, consider using a cellular module for connectivity.
Additionally, setting up a static IP address can be beneficial for long-term projects. This ensures that your Raspberry Pi always has the same IP, making it easier to access and manage.
Securing Your Network
With great power comes great responsibility. As your IoT setup grows, so does the risk of security breaches. Make sure to secure your network by enabling firewalls, using strong passwords, and keeping your software updated.
And don’t forget about encryption. If you’re transmitting sensitive data, consider using SSL/TLS to encrypt your communications. It’s an extra layer of protection that can save you from potential threats.
Integrating Sensors in IoT Projects
Sensors are the eyes and ears of your IoT setup. They collect data from the environment and send it to your Raspberry Pi for processing. The type of sensors you choose will depend on the application you’re building.
For instance, if you’re building a home automation system, you might need motion sensors, temperature sensors, and light sensors. On the other hand, if you’re working on an agricultural project, soil moisture sensors and weather sensors would be more appropriate.
Connecting Sensors to Raspberry Pi
Connecting sensors to Raspberry Pi is relatively straightforward. Most sensors come with detailed documentation and example code to help you get started. Here’s a quick guide:
- Identify the pins on your Raspberry Pi that you’ll be using.
- Connect the sensor’s data pin to the appropriate GPIO pin on the Pi.
- Power the sensor using the 3.3V or 5V pin, depending on its requirements.
- Write a script to read data from the sensor and process it accordingly.
And just like that, you’ve got yourself a functioning IoT sensor network!
Connecting to the Cloud for Data Management
One of the biggest advantages of IoT is the ability to store and analyze data in the cloud. This allows you to access your data from anywhere and perform complex analyses without overloading your Raspberry Pi.
There are several cloud platforms you can use, such as AWS IoT, Google Cloud IoT, and Microsoft Azure IoT. Each platform offers its own set of tools and features, so choose the one that best fits your needs.
Setting Up Cloud Integration
Connecting your Raspberry Pi to the cloud involves a few steps:
- Create an account on your chosen cloud platform.
- Set up a device in the platform’s IoT dashboard.
- Install the necessary libraries on your Raspberry Pi.
- Write a script to send data to the cloud at regular intervals.
With cloud integration, you can visualize your data in real-time, set up alerts, and even control your devices remotely. It’s like having a personal assistant for your IoT setup.
Securing Your IoT Deployment
Security should always be a top priority when deploying IoT projects. With the increasing number of connected devices, the risk of cyberattacks has also risen. Here are some best practices to keep your setup safe:
- Use Strong Passwords: Avoid using default passwords and change them regularly.
- Enable Firewall: Restrict access to your Raspberry Pi by enabling a firewall.
- Keep Software Updated: Regularly update your OS and applications to patch vulnerabilities.
- Encrypt Communications: Use SSL/TLS to encrypt data transmissions between devices.
Remember, security is an ongoing process. Stay informed about the latest threats and adapt your strategies accordingly. It’s better to be safe than sorry!
Real-World Applications of IoT with Raspberry Pi
The possibilities with IoT and Raspberry Pi are endless. Here are a few real-world applications that showcase the power of this combination:
- Smart Home Automation: Control lights, thermostats, and security systems with ease.
- Environmental Monitoring: Track air quality, temperature, and humidity levels in real-time.
- Agricultural Solutions: Implement smart irrigation systems to optimize water usage.
- Healthcare Innovations: Develop wearable devices that monitor vital signs and alert caregivers.
These applications not only improve efficiency but also enhance the quality of life. With Raspberry Pi, you can bring your creative ideas to life and make a real impact.
The Future of IoT and Raspberry Pi
As technology continues to evolve, so does the potential of IoT and Raspberry Pi. We’re seeing advancements in areas like edge computing, artificial intelligence, and 5G connectivity, all of which will further enhance IoT capabilities.
Imagine a world where your home appliances can predict your needs before you even think of them. Or where farms can produce more food with less water. These are just a glimpse of what the future holds for IoT and Raspberry Pi.
So, if you’re ready to be part of this exciting journey, start experimenting with your Raspberry Pi today. Who knows, your next project might just change the world!
Kesimpulan
In conclusion, deploying IoT using Raspberry Pi is a rewarding experience that combines creativity with technology. From setting up hardware to securing your network, each step is crucial in building a


 works in real-world scenarios? Well, buckle up because we're diving deep into the world of IoT deployment using R)